To use the features of dynamic revocation, number of accesses and number of prints (additional access rights control), you should configure the web service and SQL first. Please follow the steps as below:
1. Configure the Web Service on your on-premise AIP server.
a) Log on AIP server as Administrator.
b) Download the Web Service zip from:
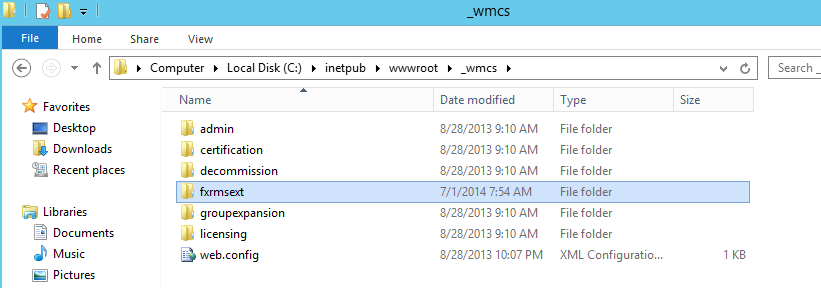
c) Unzip the Web Service zip and get the fxrmsext from it.
d) Copy the fxrmsext to C:\inetpub\wwwroot\_wmcs.
e) Run “Internet Information Services” (IIS).
f) Right-click “_wmcs”, and then choose “Add Application…”.
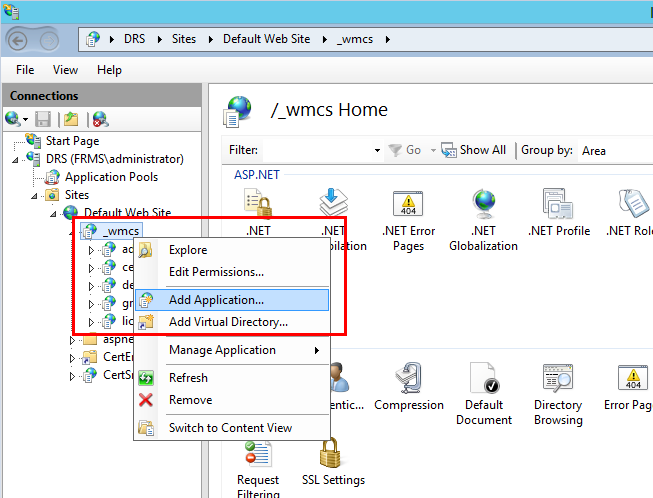
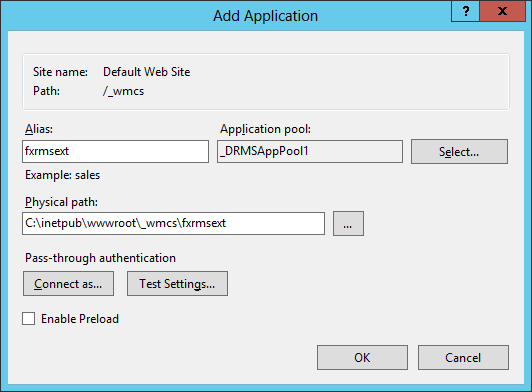
g) Input the following information into the Add Application dialog box.
- Alias: fxrmsext
- Application Pool: DRMSAppPool1
Physical path: C:\inetpub\wwwroot\_wmcs\fxrmsext
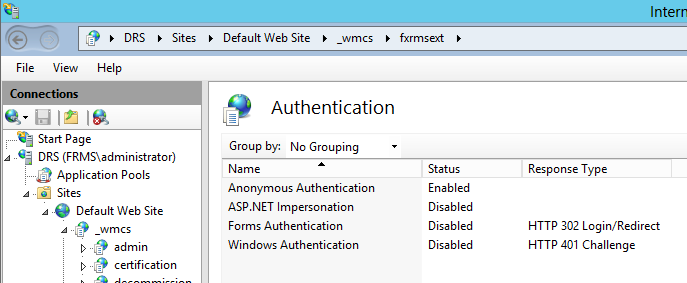
h) To avoid repeated authentication, we should disable the Windows Authentication and enable the Anonymous Authentication. Click “fxmsext” in Connections Pane, and then double-click “Authentication”.
NOTE: For data communication security, PDFs will be encrypted with AES algorithm by default.

i) Enable the “Anonymous Authentication” and disable the “Windows Authentication”.
2. Configure the SQL.
a) Navigate to C:\inetpub\wwwroot\_wmcs\fxrmsext.
b) Right-click “Web.config” file -> “Open with” -> “Notepad”.

c) If you want to log on to the SQL Server through Windows Authentication, you just need to alter the SQL Server information by inputting the IP address or computer name and then saving the change.
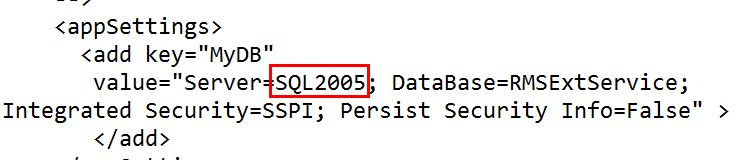
NOTE: If the computer name include ‘-’, please ensure you are using SQL 2012 version or higher.
d) If you want to log on to the SQL Server through SQL Server Authentication, please follow the steps:
i. Copy “Server=SQL2005; DataBase=RMSExtService; User ID=myUsername; Password=myPassword”.
ii. Paste and replace “Server=SQL2005; DataBase=RMSExtService; Integrated Security=SSPI; Persist Security Info=False”.
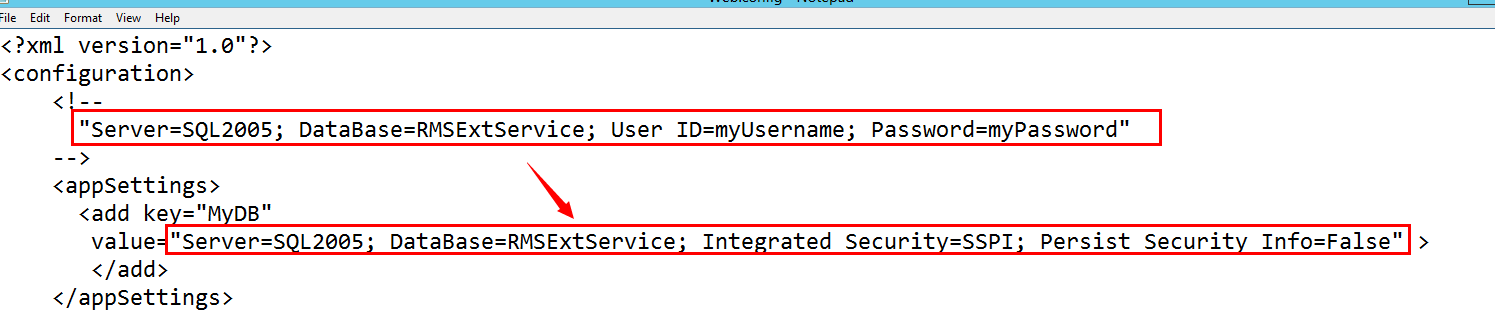
iii. Alter the SQL Server information. You can input the IP address or the computer name.
iv. Alter the “User ID” and “Password”.
v. Save changes.
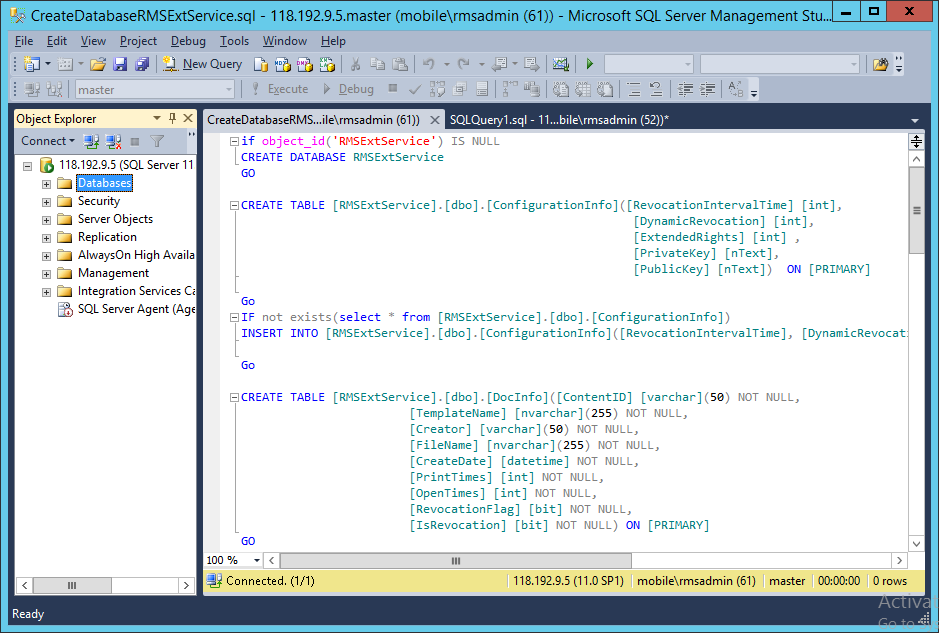
e) Create the data base and tables.
i. Log on to the SQL Server as Administrator.
ii. Get the .sql file from the Web Service zip you downloaded before.
iii. Double-click this file to create the database and tables, and then click “Execute”.
f) Grant AIP administrator the database operations rights.
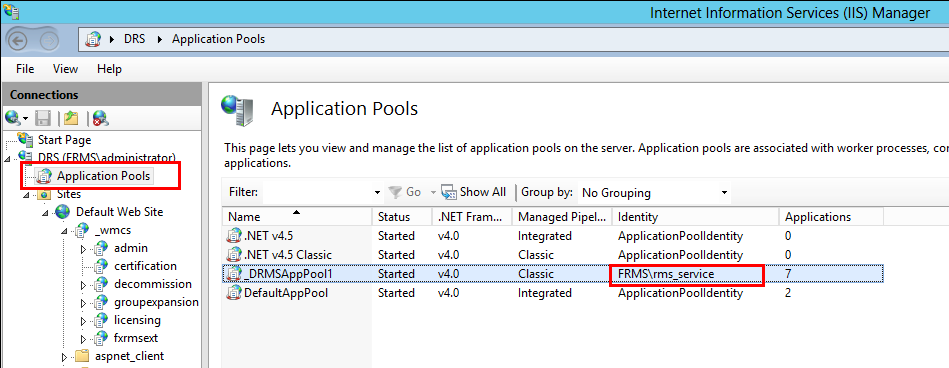
i. Open “Internet Information Services” (IIS).
ii. Click “Application Pools” in Connections Pane. Then you can get the account information from Identity column.
iii. Open SQL Server management.
iv. Navigate to “Security” -> “Logins”.
v. Check if the AIP administrator account is listed.
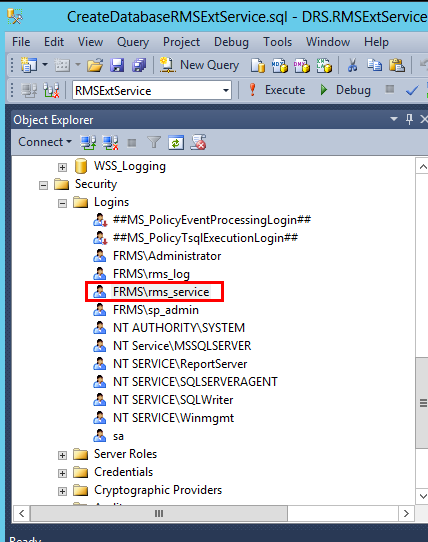
If yes, skip to Step vi.
If not, right-click “Logins”, then click “New Login”.

Input the Login name, click OK.

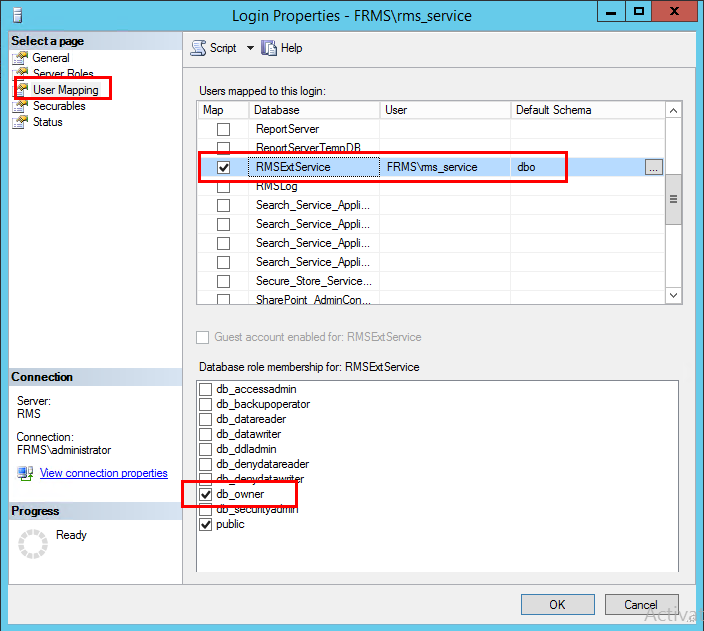
vi. Grant AIP administrator as the database owner.
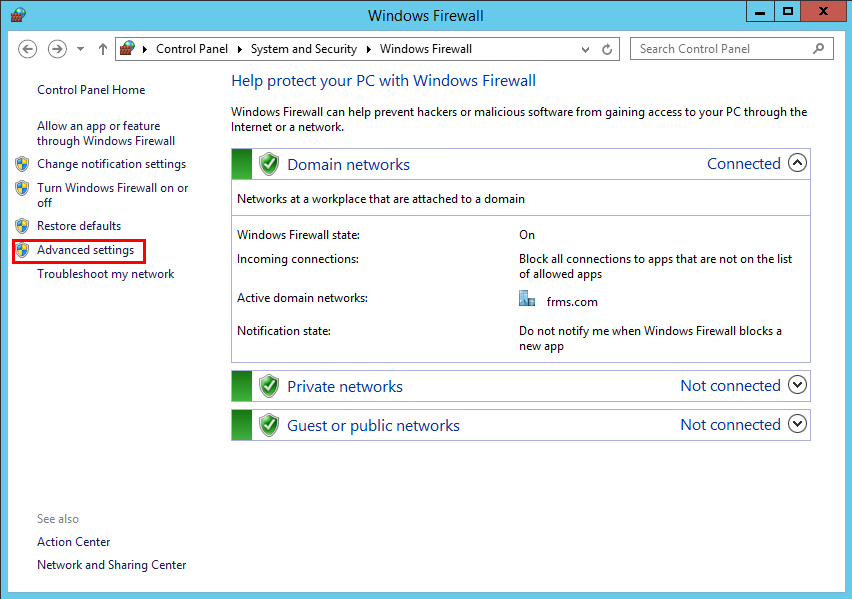
g) Set up the firewall.
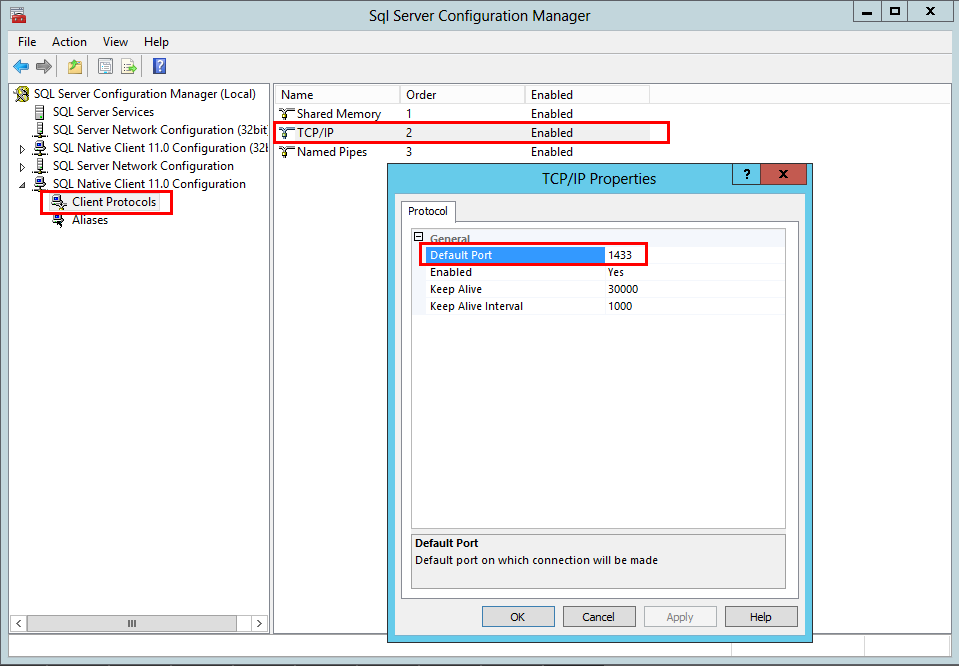
i. In SQL Server Configuration Manager, expand SQL Native Client Configuration, and click “Client Protocols” and right-click “TCP/IP Properties” to get the default port.
ii. Run “Windows Firewall” and click “Advanced settings”.
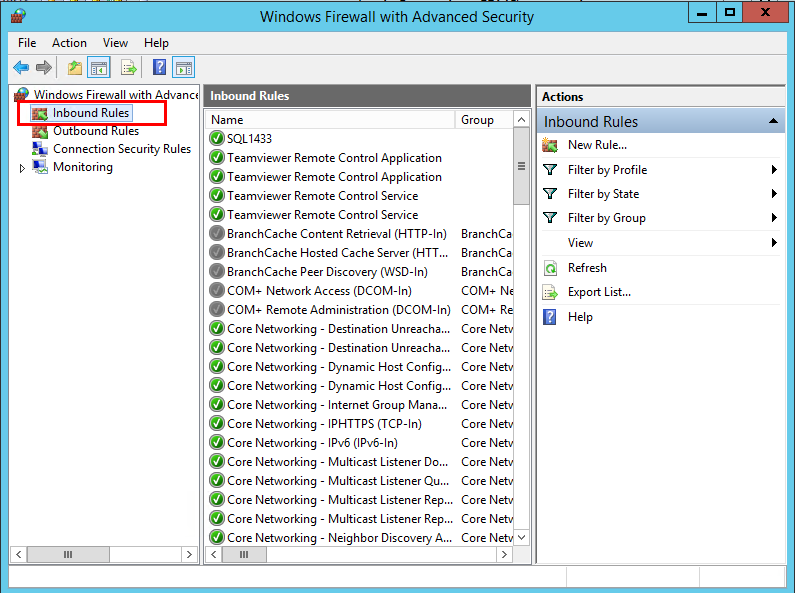
iii. Click “Inbound Rules”.
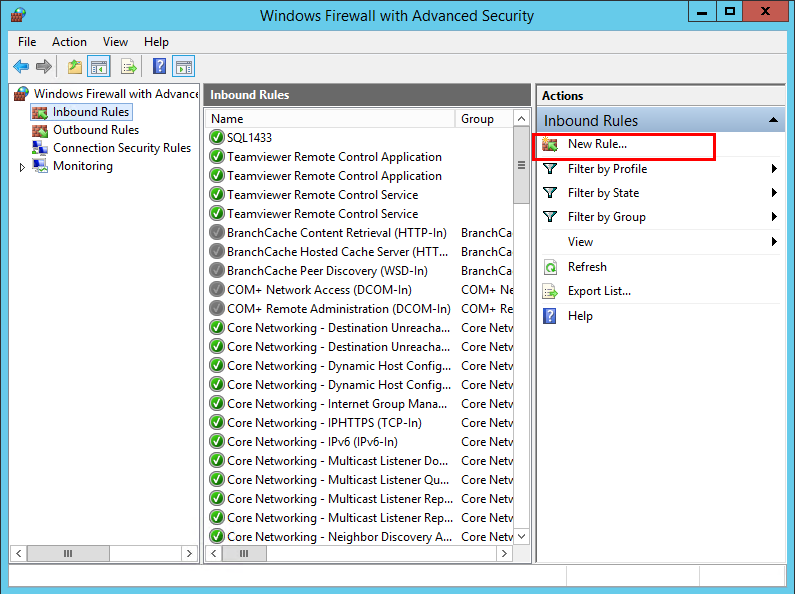
iv. Click “New Rule…”.
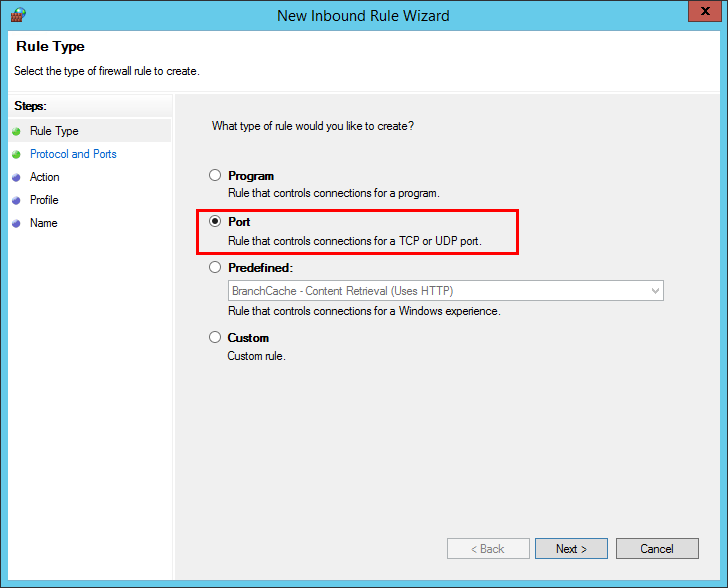
v. Select “Port” and then click “Next”.
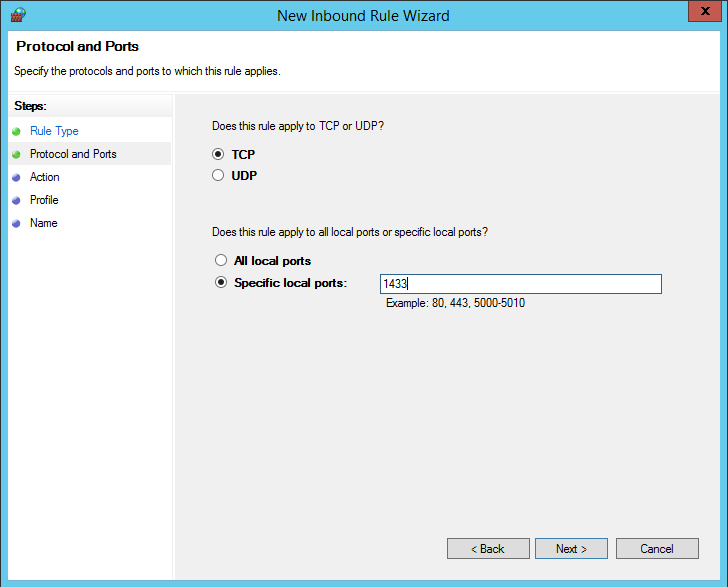
vi. Select “TCP”, then select “Specific local ports”, type the SQL port number, and click “Next”.
vii. Select “Allow the connection”, and then click “Next”.

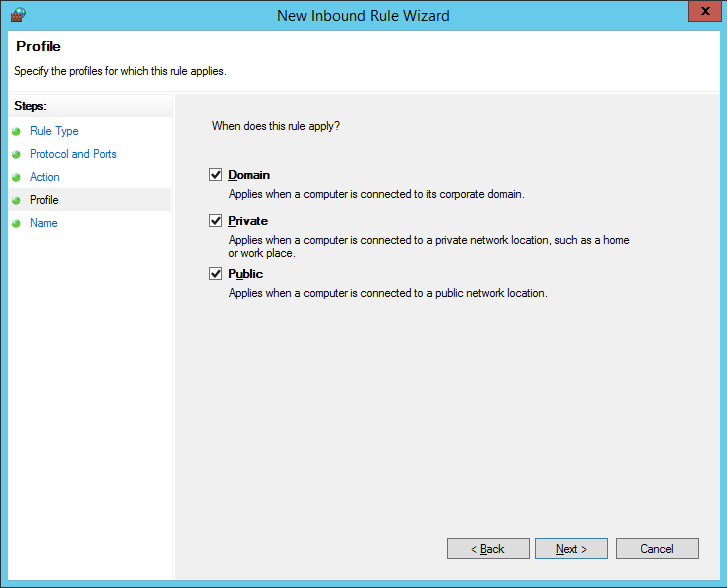
viii. Choose when to apply the rule.
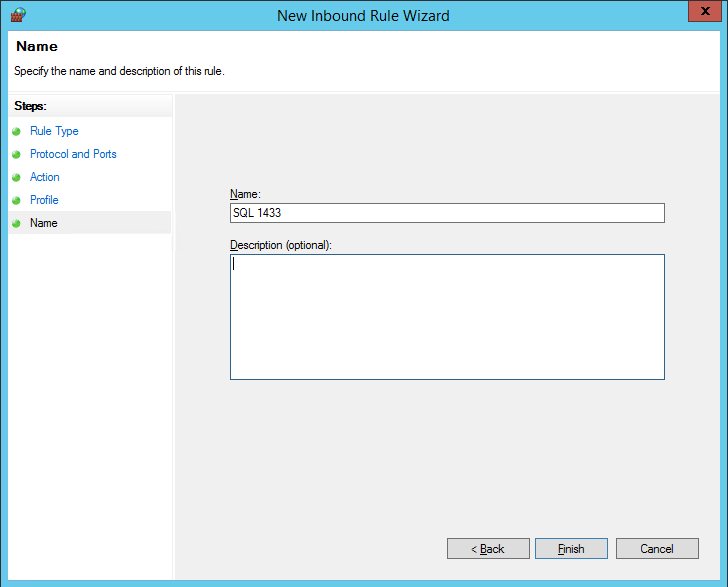
ix. Specify the name and description of the rule and then click “Finish”.